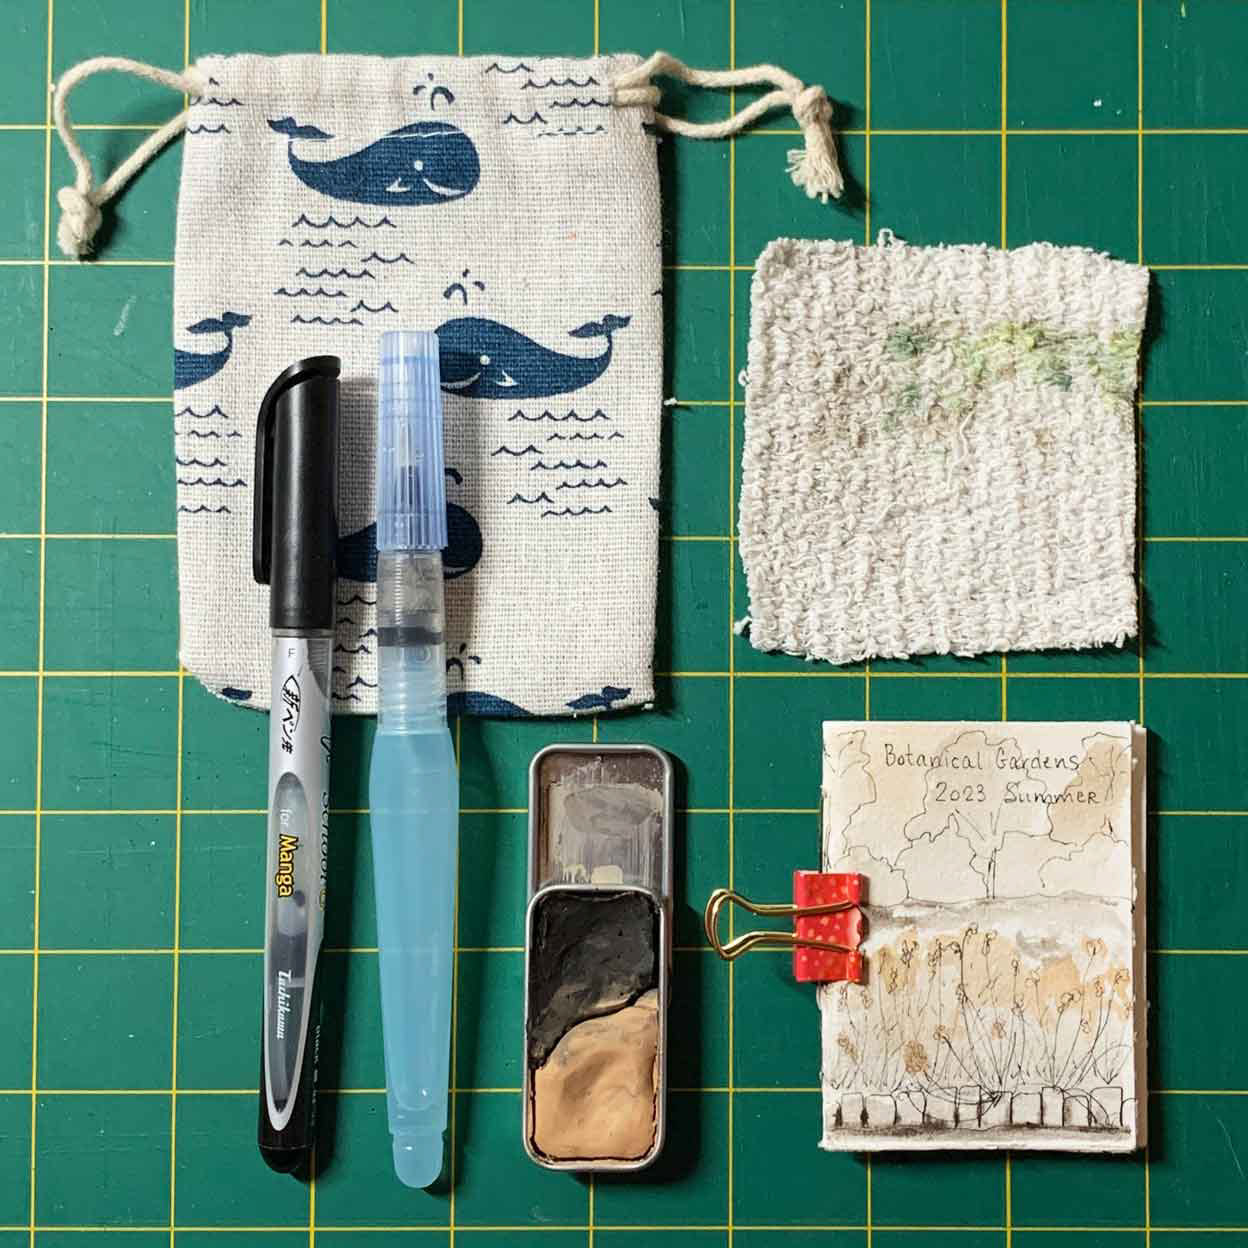
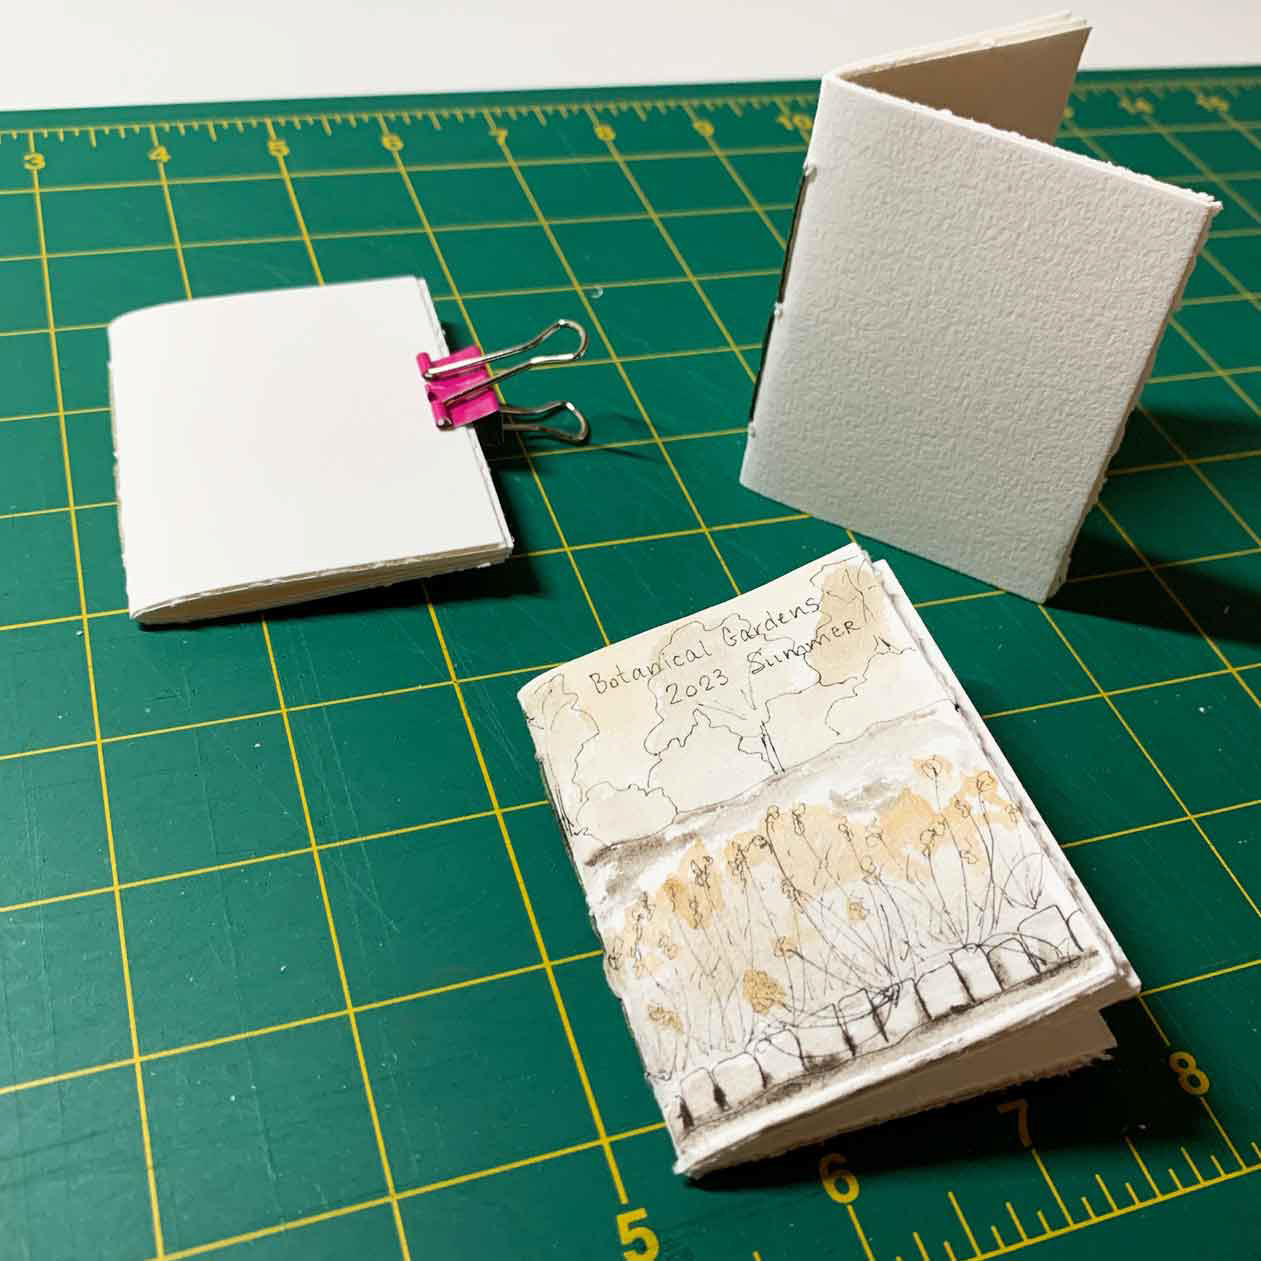
A small, single signature pamphlet sketchbook is super easy to make. You can use it to collect travel sketches, explore techniques, or swatch color palettes. I carry one with me when I visit the botanical garden. More on that tiny travel kit below, but first let’s look at how to make your own tiny journal.
Supplies Needed
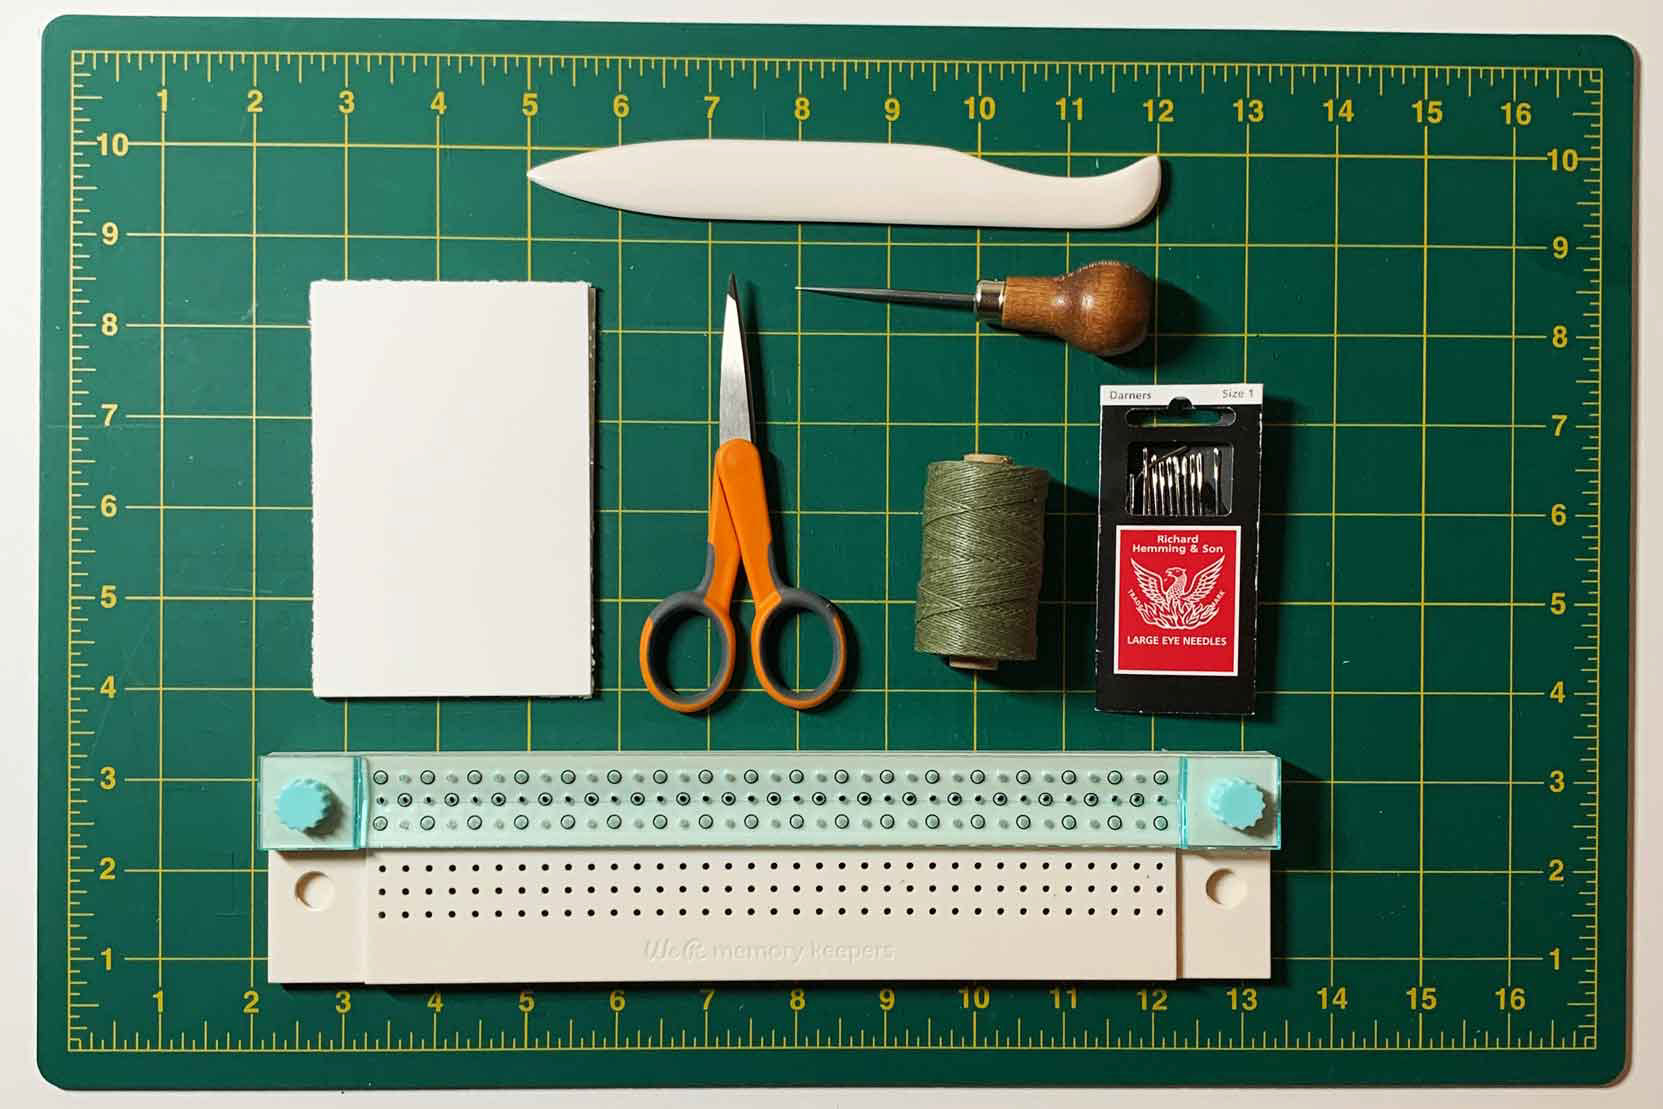
• Scissors.
• Bone Folder. These are sold at most craft supply stores and assist with making a smooth crease. They do not need to be made out of an actual bone, but some are. Mine is synthetic. You can also make folds using just your fingers.
• Darning Needle or a sturdy needle with a wide eye and a sharp point.
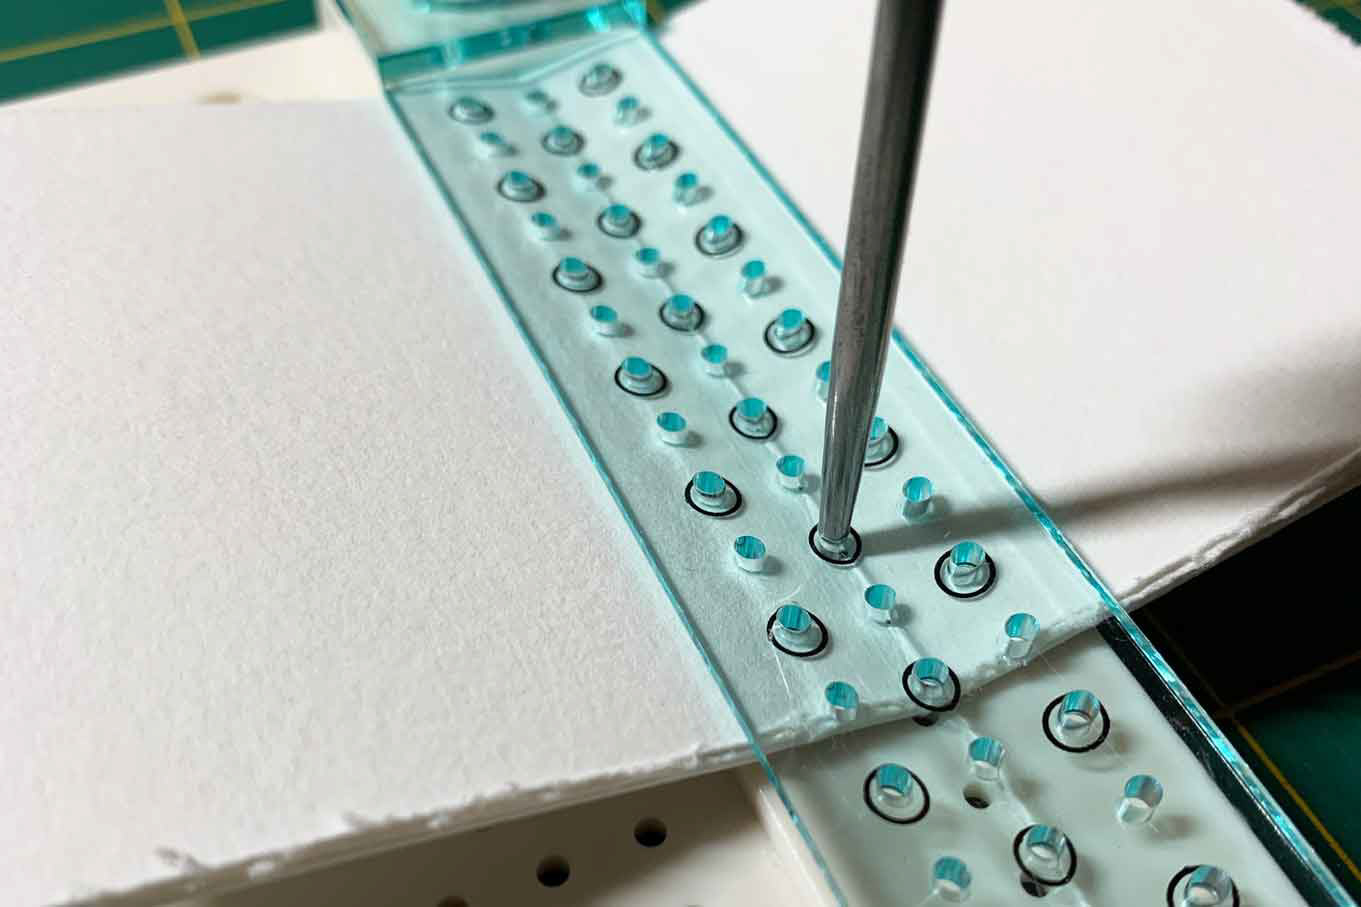
• Awl. You can also use the needle for punching, it’s just a bit harder on your fingers.
• Waxed Thread. You can get spools at bookbinding stores, or you can use embroidery thread and run it over a beeswax block so it is stickier. The waxed thread helps to keep the binding in place and the knot secure. However, I’ve also made nice little books with several strands of unwaxed embroidery thread, so feel free to experiment.
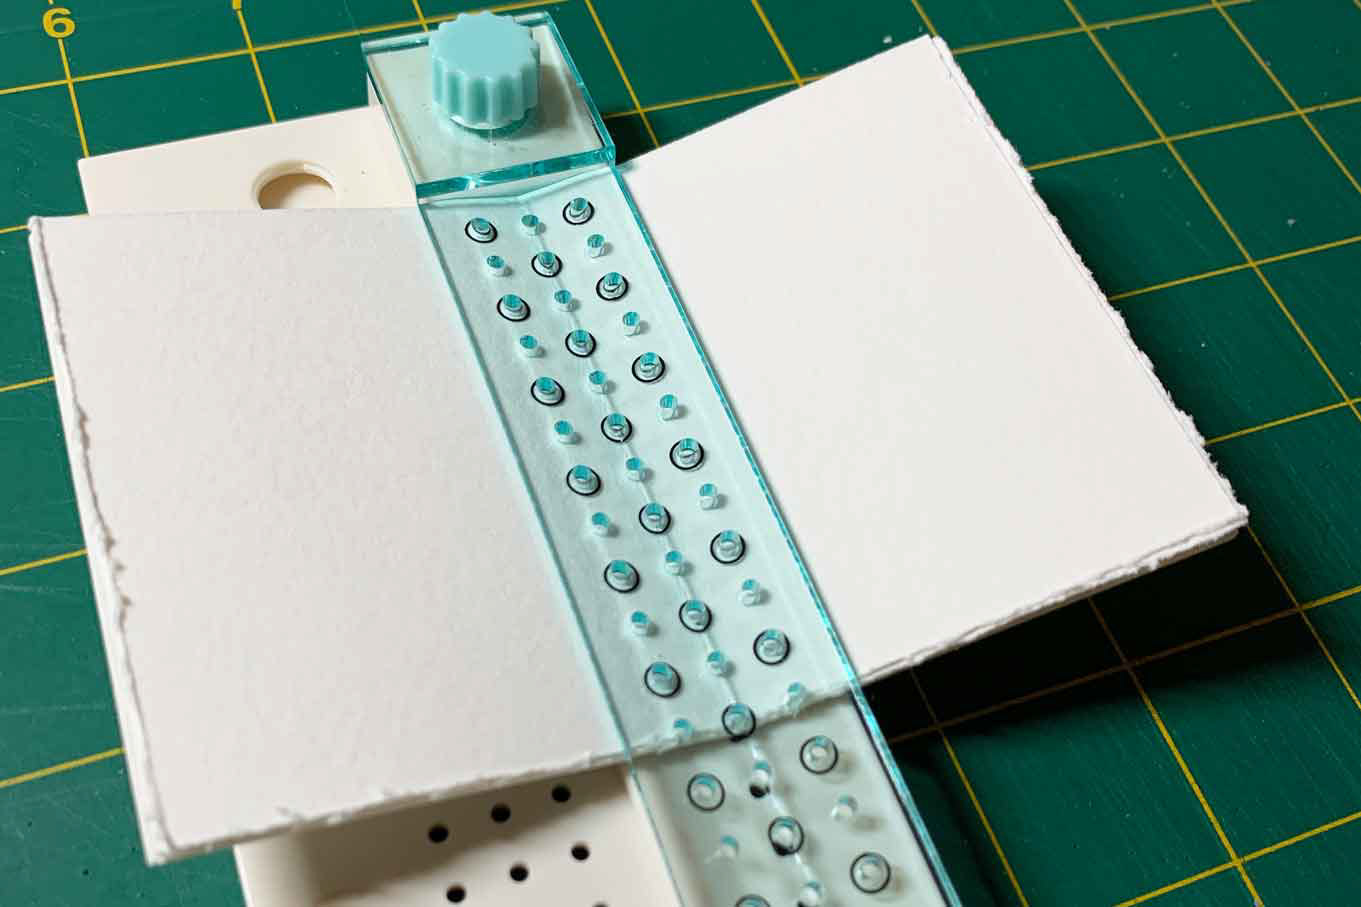
• Punch Cradle. I have an inexpensive one from We R Memory Keepers, but there are larger and more sturdy ones available at bookbinding stores. The benefit of having this cradle is that you can align your papers and use the holes without having to measure. You don’t need a cradle at all though, you can measure your holes and mark them with a pencil inside the folds of your papers so you know where to punch.
• Paper cut in equal sized sheets. These sheets are 3 x 4.5 inches, which makes a 2.25 x 3 inch book. I used a larger sheet of 140lb watercolor paper that I cut down to size. You can use any paper you like, just be sure it is thick enough for sewing, folds neatly, and can handle the art supplies you will be using. Thin papers are more likely to tear when sewn.
Folding the Papers
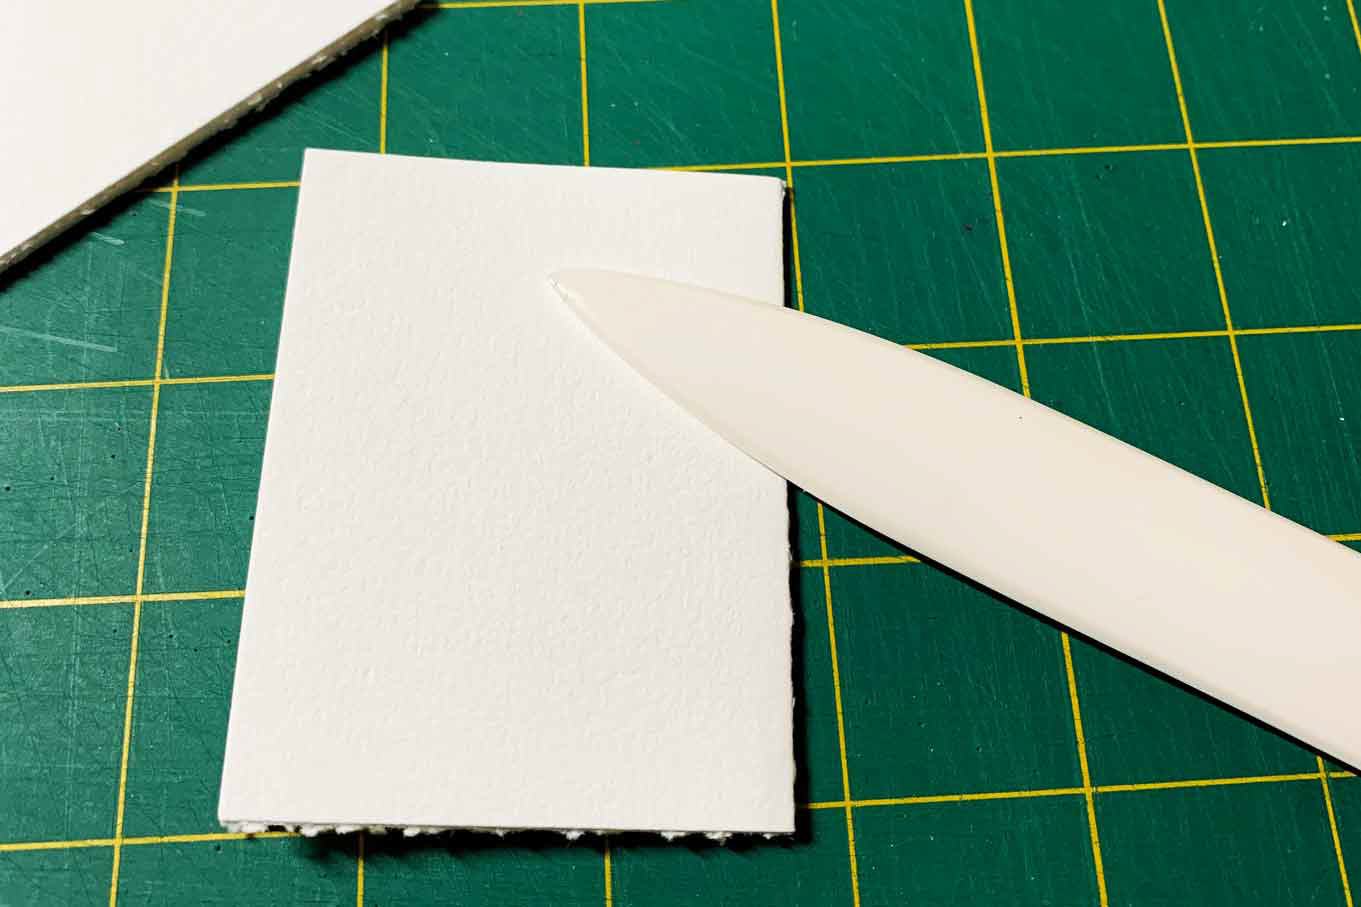
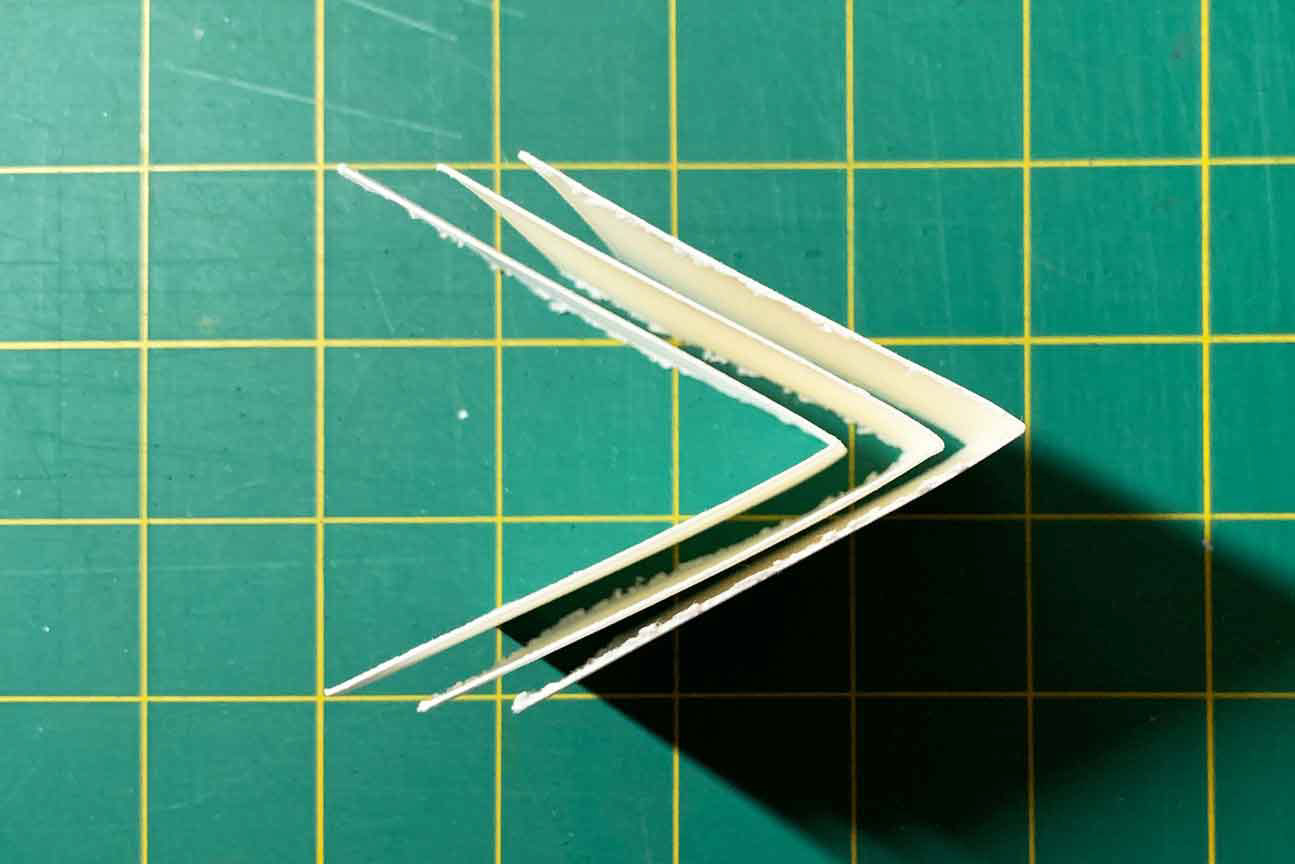
Once you have your supplies together, fold the paper sheets in half, one at at time. Smooth the fold with the bone folder. I used three sheets in these books because watercolor paper is thick and I wanted the book to close neatly. If you use thinner paper you can add more pages. As a rough rule though, I try not to use more than four sheets in any of my single signature sketchbooks.
When folding paper, there is a right way and a wrong way. If you fold paper the wrong way it will make a cracked and uneven crease. If you fold it the right way, the crease will be crisp. This is because paper grain is directional based on how it was made. I won’t get into the nitty gritty details of paper grain, but you can determine the grain of your paper by gently bending it one way and then the opposite way. One direction will feel easier than the other; this can be a very subtle with some papers so don’t over think it. Use the easier bend direction for the best crease.
Punching the Papers
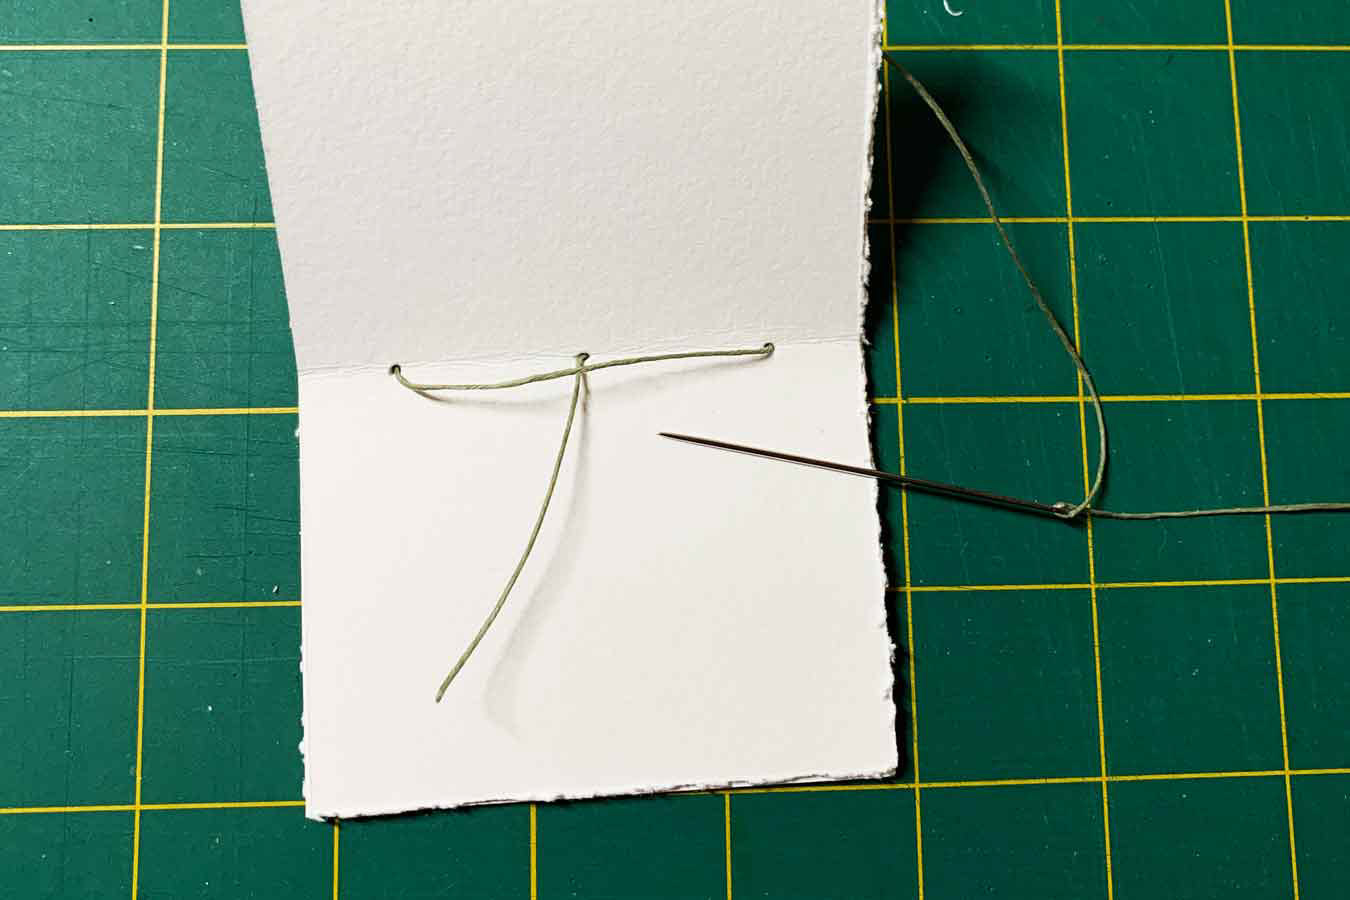
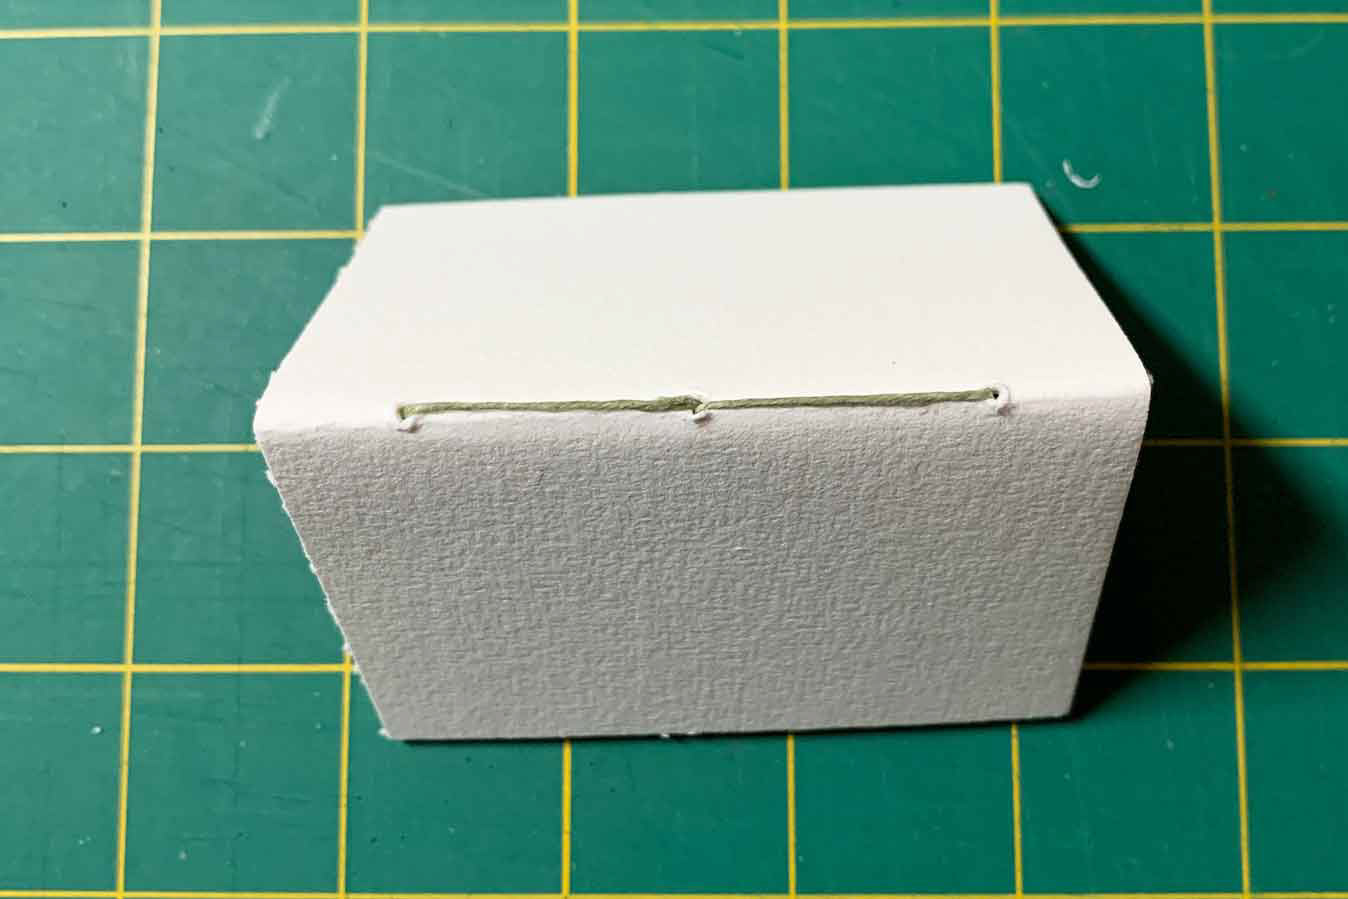
This binding technique needs three holes, evenly spaced from the center of the paper. You can measure this and mark it with a pencil, or use the guides on a punch cradle to find the holes you need. If a neat book is important to you, the holes need to be in the same place on each sheet.
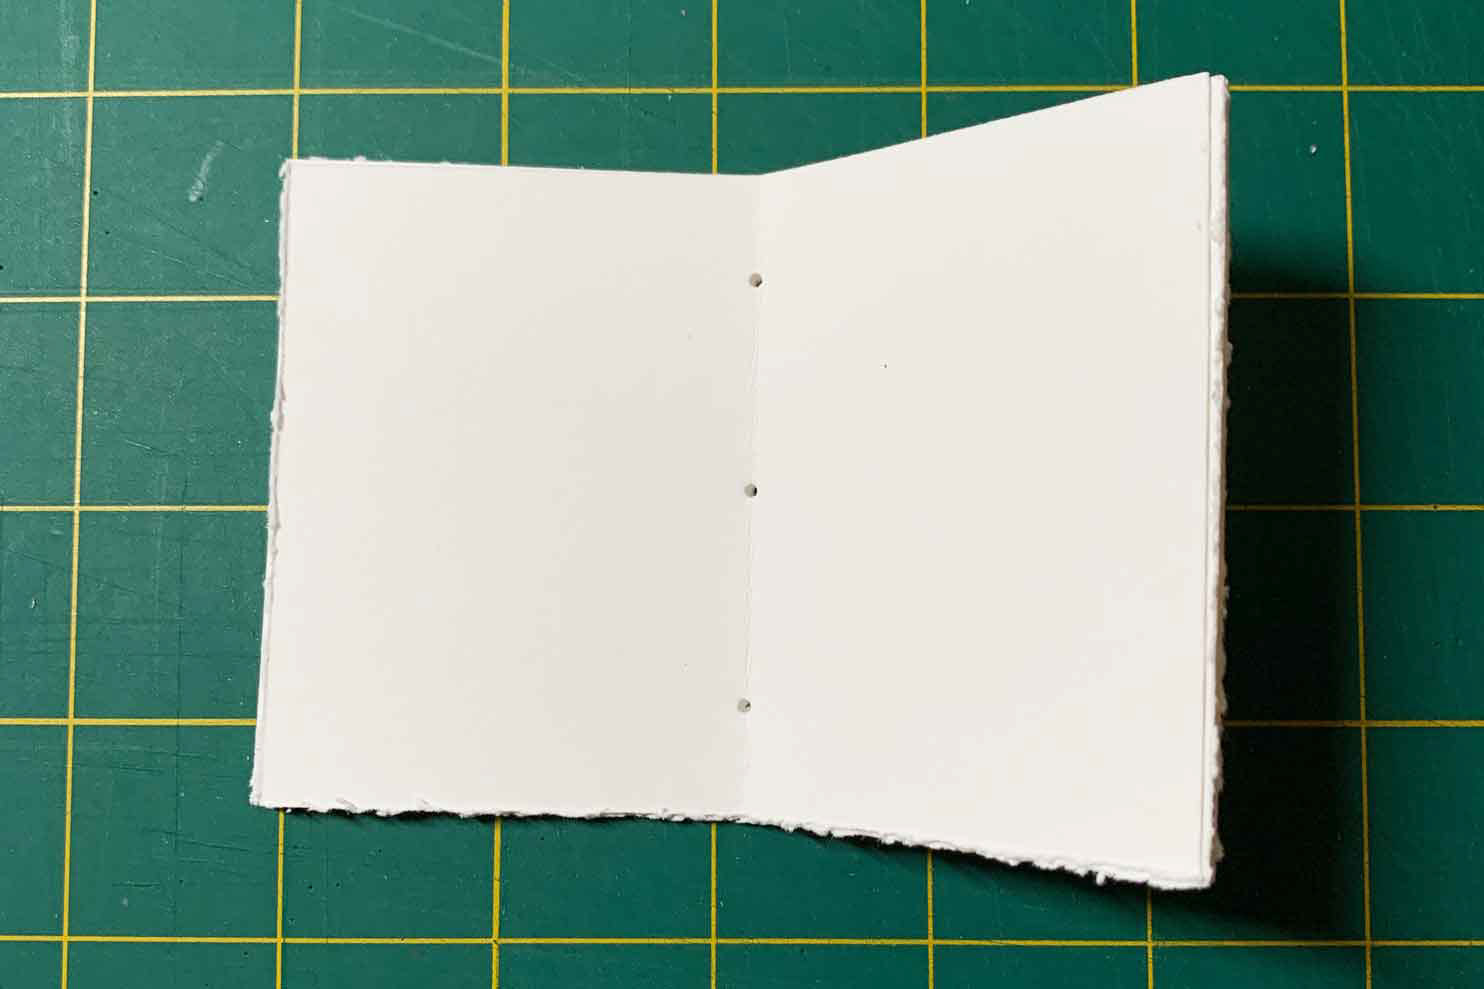
Sewing the Binding
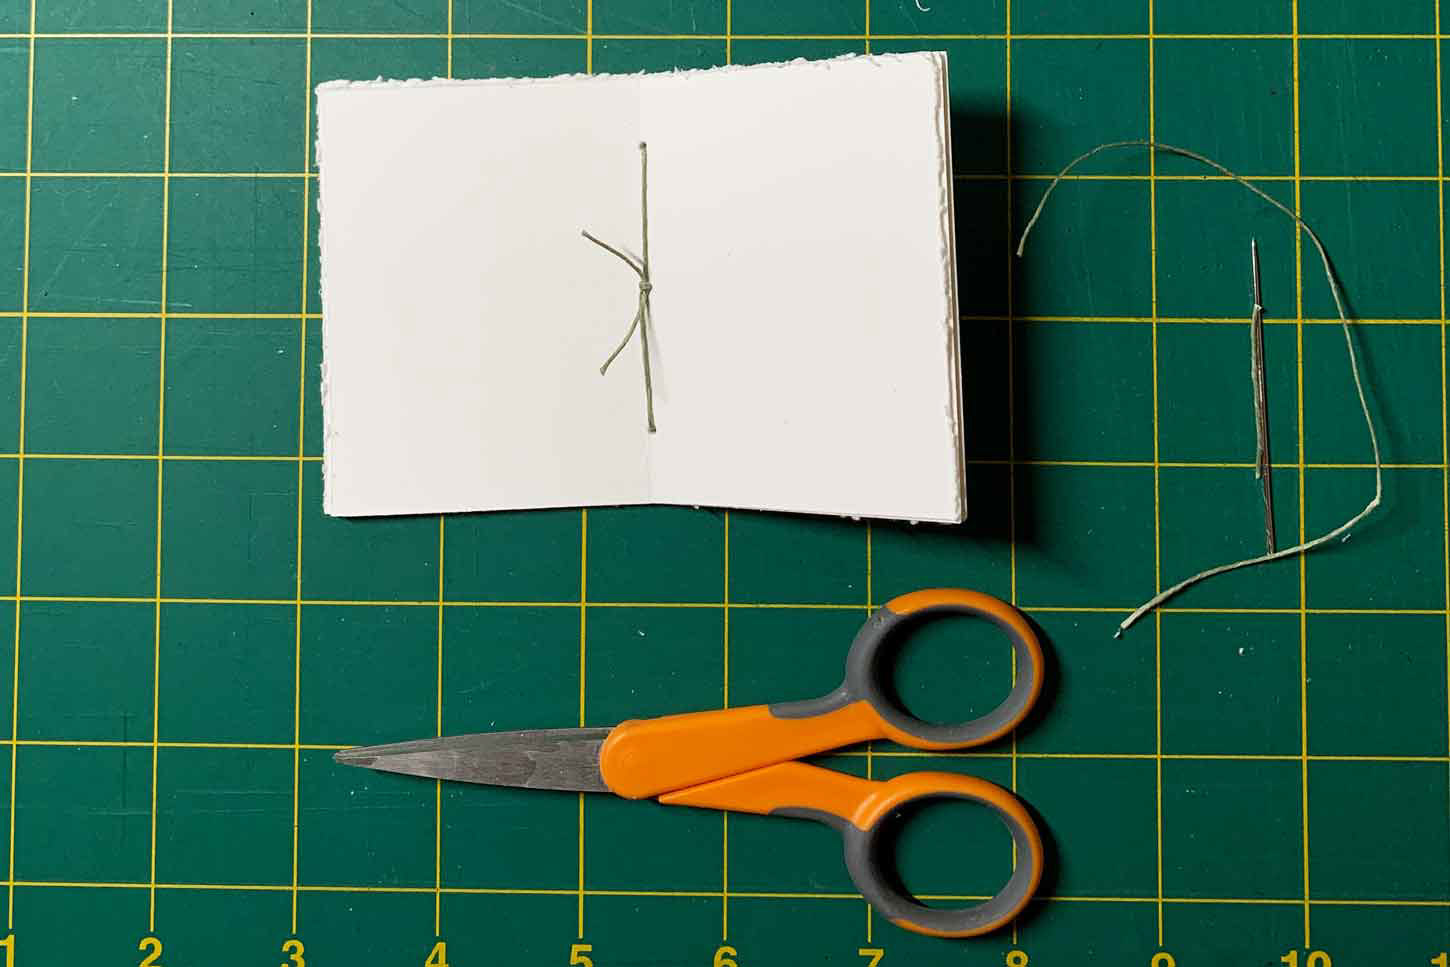
Thread your needle with the waxed thread and begin by sewing the thread through all the papers from the center hole outward. Then bring it in one of the outer holes and out through the other outer hole. Finally bring the thread back through the center hole, tie a knot and trim the ends. I like my knots on the inside, but you can also do this procedure in the opposite direction so the knot is on the outside of the spine.
That’s it. All done!
More Ideas for Handmade Books
I don’t usually add covers to my tiny books because I prefer to draw or write my own cover designs, but if you would like a cover, just cut a piece of patterned or colored paper the same size as your other papers, fold and punch it in the same way, place it on the outside of your paper stack, and sew it all together.
You can also use this same method to make tiny notebooks, greeting cards, or memory books. Experiment with different types of papers, different colored papers, or even get wild and mix up colors and types in a single book. They make lovely handmade gifts, too.
Small Enough for Everyday Adventures
My tiny art journals are the perfect compact size and I’ve even created a very tiny sketching kit that I can carry on walks. I use a sketch pen, a water brush, and a two-color palette to capture things that draw my attention. It all fits in this cute little drawstring bag.